
Sure. Pie dough can be bought from the store, but it is often packaged with just two round pieces when you could need less, more, or a different shape for your pie dough needs. Also, using pre-made dough doesn’t allow for adjustments to the flakiness or flavor of the pie dough. TO BE CLEAR: Yes, store-bought pie dough definitely works in a pinch, but when you have some extra time and energy, here’s an easy, delicious, and versatile pie dough recipe to use for all of your homemade pies, tarts, quiches, and more!
Ingredients you’ll need
Dairy
- Unsalted butter (keep it very cold!)
Baking & Pantry Items
- All-purpose flour
- Fine kosher salt
- White sugar (optional)
Other
- Ice cold water
Equipment you’ll need
- Measuring cups/spoons
- Mixing bowl
- Rolling pin
- Clean surface or silicone prep mat for rolling
- Parchment paper and plastic wrap (for chilling and storing dough)
Pie dough standards and best practices
Best kind of flour(s) to use? Flours with a protein level of 8-12% are best for making pie crusts. Most all-purpose flours fall within this range, so feel free any that you have on hand (White Lily is my favorite). For a more tender crust, use a pastry flour that falls on the lower end (around 8% – like Bob Mill’s Fine Pastry Flour). For a sturdier crust, an unbleached all-purpose flour (between 9-12% – like King Arthur Unbleached All-Purpose Flour) is perfect.
Best kind of butter to use? Real, unsalted butter. The higher the fat content the better. I like to use Challenge brand butter.
Ideal pie dough thickness? 1/8-inch thick is perfect for most pies, tarts, quiches, etc. A shortcut to measuring the thickness of your dough is to stack two (2) quarters on top of each other – that is about 1/8 of an inch.
Things to AVOID when making pie dough:
- Working in a warm room or on top of the preheating oven. Remember: the key to great, flaky pie dough is keeping the dough cold throughout the rolling and assembly processes.
- Overworking the dough. Not only will this add unnecessary heat the the dough, it will encourage those tough gluten strands to develop in your dough before you’ve even started baking.
- Adding too much water. Add just enough to help the dough come together. Excess moisture will keep the dough wet for too long in the oven. The evaporation (expansion of air pockets) necessary to make a flaky crust will happen too late in the baking process resulting in a tough, dense pie crust.
All-butter vs. All-shortening vs. Hybrid pie doughs
All-butter doughs
Full of delicious buttery flavor. Very flaky. Makes for a strong, sturdy crust. Must be kept cold at all times to bake and flake correctly.
All-shortening doughs
Super tender crust. Less flaky than a crust with butter. The taste suffers due to the filmy residue that is often left by the shortening because it doesn’t melt like butter when it hits the tongue. It’s also more forgiving due to the fact that shortening can be worked with without it melting into the dough.
Hybrid doughs (part butter-part shortening)
Some say this combination is the best of both worlds. Makes a buttery crust that is sturdy enough to hold hearty fillings and is still tender.
Substitutions and modifications
- Substitute shortening for butter (or vice versa): To use shortening instead of butter (completely or in part), there a 1:1 ratio. For example, if a recipe calls for 1/2 cup of butter, use 1/2 of shortening instead. If you want to substitute only half of the butter for shortening, use 1/4 cup butter and 1/4 cup shortening
- Add sugar to the crust recipe: This is completely optional, but the slight sweetness is a lovely complement to sweet dishes like fruit pies and custards
- For gluten-free crusts: Combine gluten-free flour, butter, baking powder, sour cream, and salt into an extra flaky pie crust
- For whole grain crusts: Use whole wheat flour instead of all-purpose or pastry flour
How and why to parbake a pie crust
Parbaking, or blind baking, is baking the crust for a short amount of time to ensure liquid fillings don’t seep through the crust. If your recipe calls for parbaking, bake your crust for 15 minutes at 350°F (176º C) using pie weights or dried beans.
For pies with no-bake fillings, bake the crust for 20-30 minutes at 375º F (191º C).
Tips and Tricks
- Freeze your flour, mixing bowls, and other utensils before you begin working. Keep dough that has been made wrapped in plastic wrap and in the refrigerator until you need to use it. Remember, you want that crust to stay as cold as possible for as long as possible.
- Dice the butter BEFORE chilling it with the rest of your ingredients/tools. It’s so much easier than trying to dice really really cold (almost frozen) butter.
- Use cookie/biscuit cutters, a pizza cutter or a butter knife to cut pie dough into unique shapes.
- If you notice your dough sticking to the counter or rolling pin, use a pinch of flour to dust the surface and rolling pin. Avoid using too much flour or it will change the texture of your crust.
- Make double and triple batches of pie dough so you can save the extra for a future use. Nobody wants to make pie dough from scratch or run to the store every single time they want to make a pie, tart, or quiche.
Ways to use your homemade pie dough
Pie dough is such a blank canvas, it can be used for as a vessel almost for anything. Just remember to minimize liquid (or consider par-baking the crust) and don’t overcook it! Here are some ideas for using pie dough at home.
- Sausage, Bacon and Mushroom Quiche
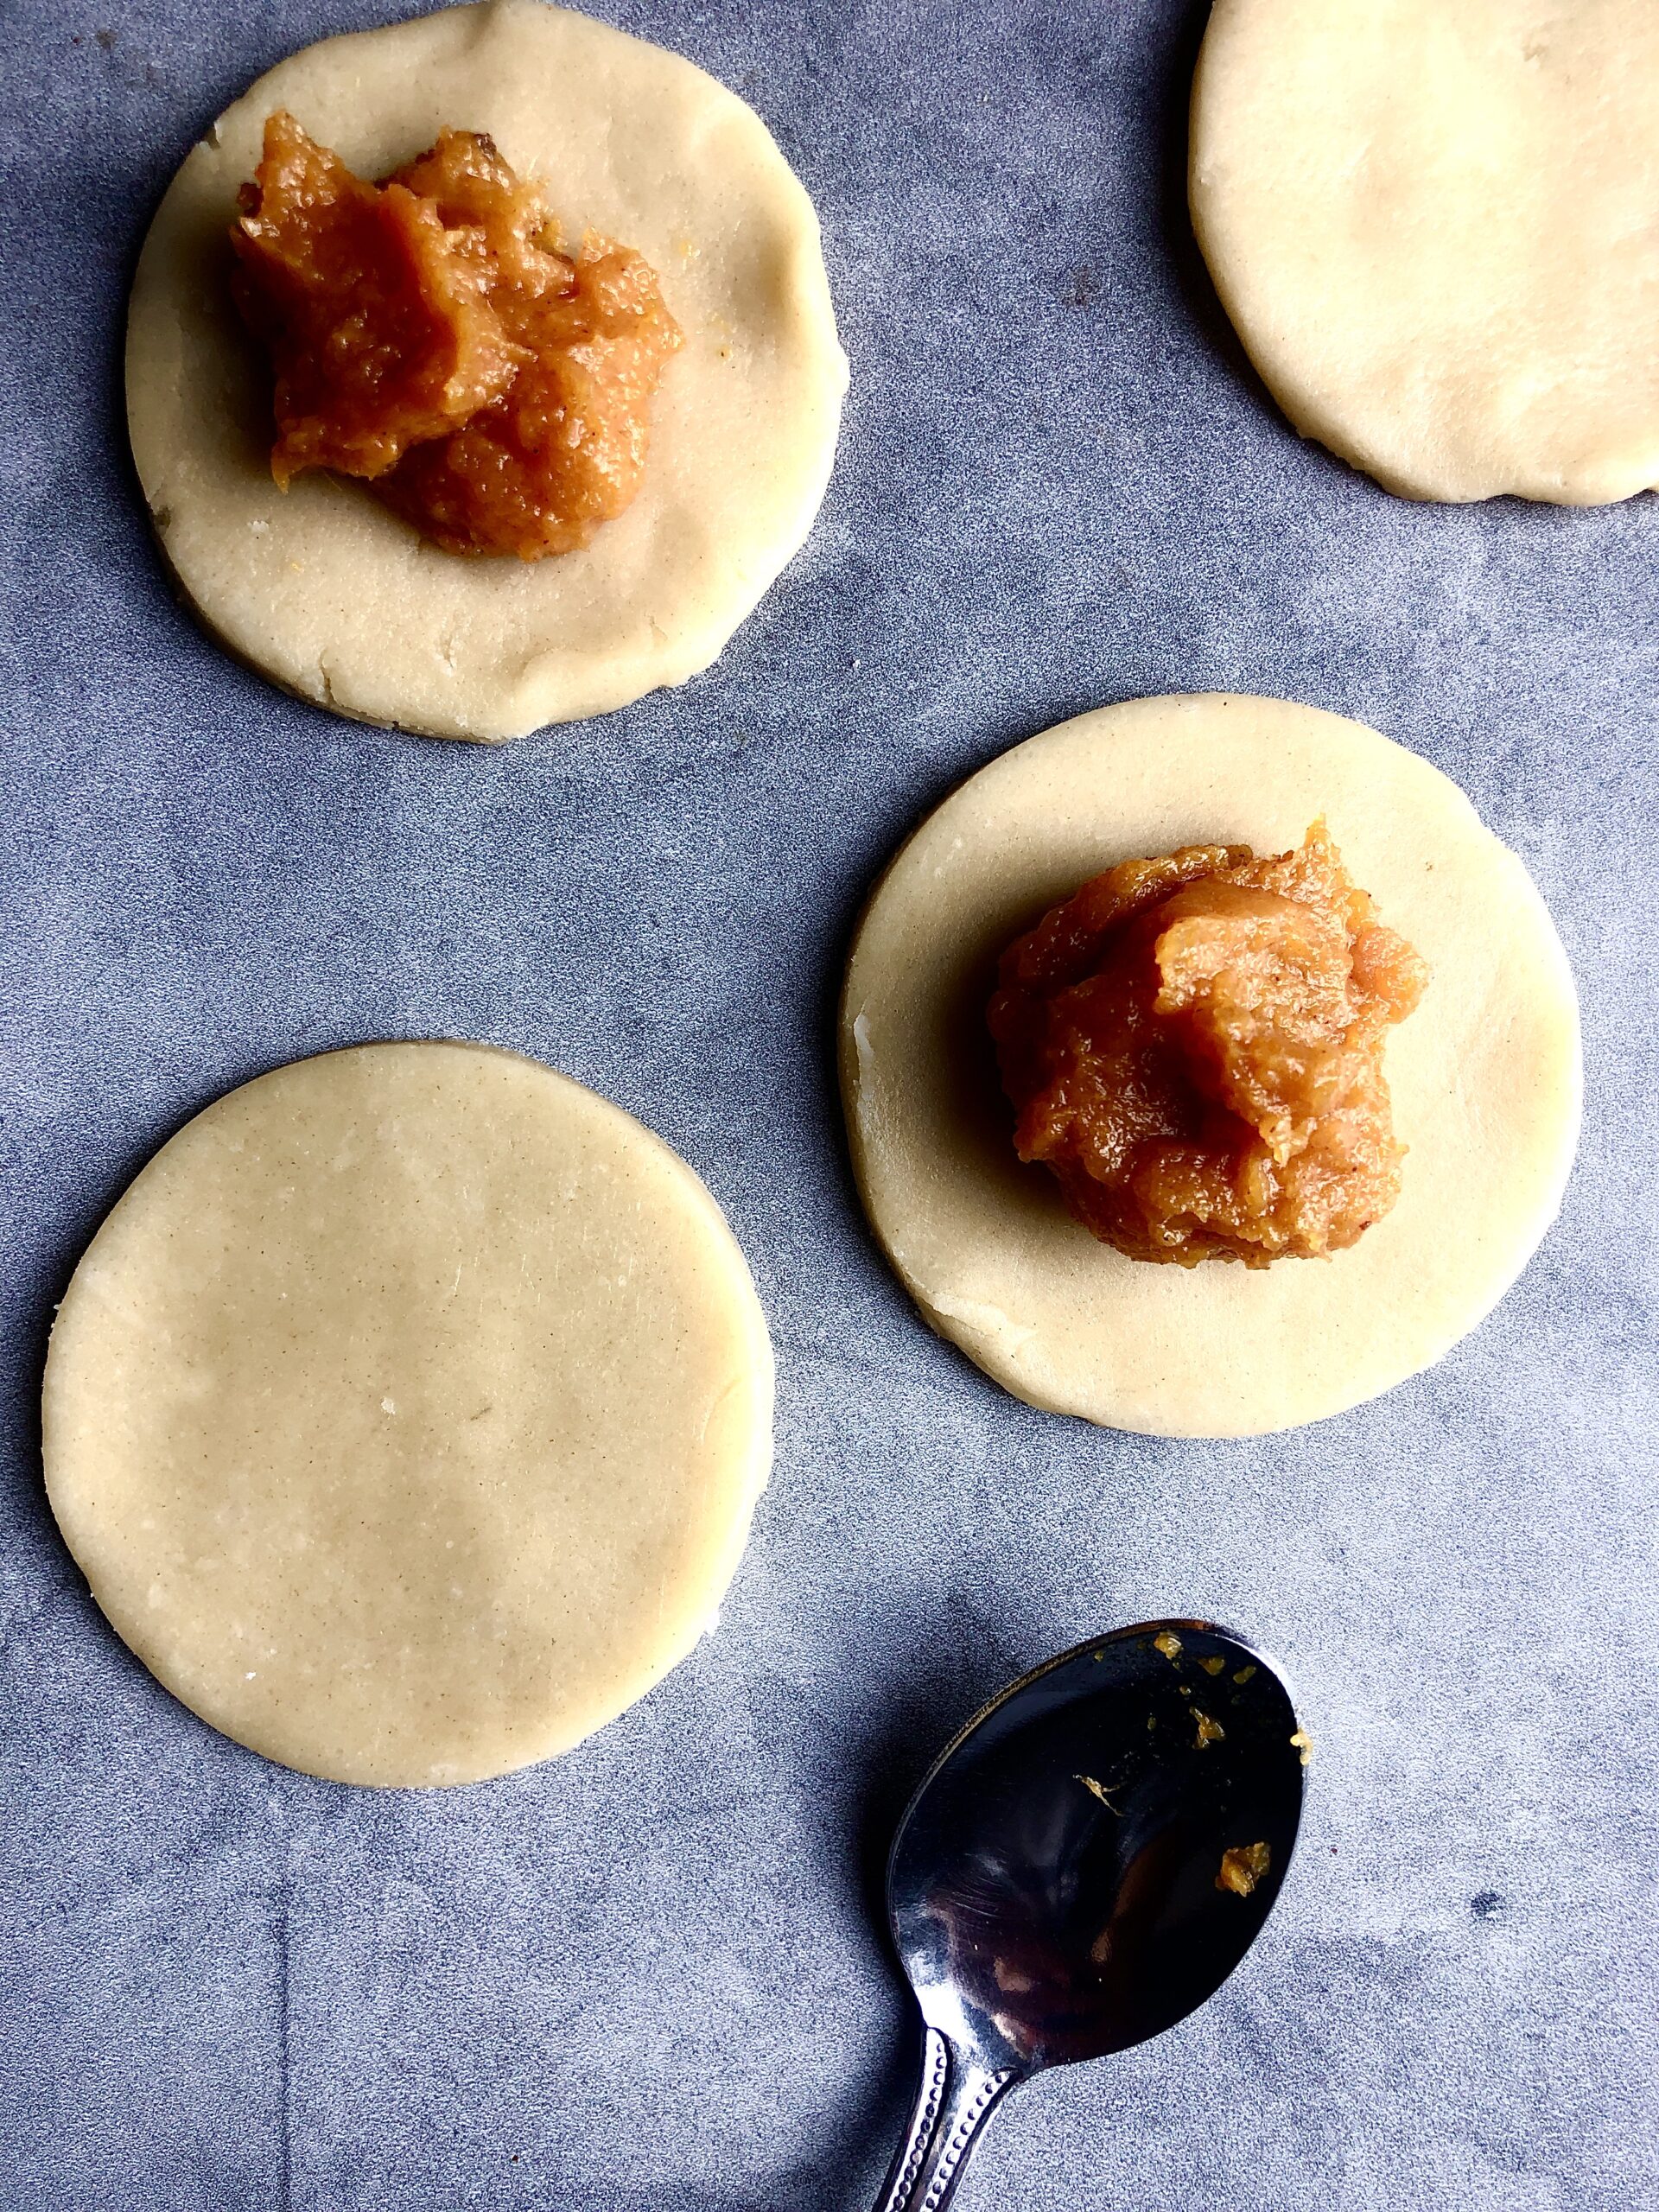
- Sweet Potato Hand Pies
- Summer Peach and Blackberry Galette
- Ham, Gruyère, and Caramelized Onion Galette with a Fried Egg
- Homemade Brown Sugar Cinnamon Pop-Tarts
- Pepperoni Pizza Pockets
Homemade Pie Crust
Ingredients
- 3 cups all-purpose or pastry flour
- 1 teaspoon salt
- 4 tablespoons sugar, optional
- 1 cup chilled, diced unsalted butter, 2 sticks
- ½ cup ice water
Instructions
To make by hand
- Combine the flour, salt, and sugar, if using, in a large bowl. Work the butter into the flour with a knife, pastry cutter, or your fingers until the mixture there are both large chunks and pea-size bits of butter throughout. Sprinkle the ice water onto the crumbly dough and, with your hands, push the dough from the sides to the middle of the bowl to form a ball that holds together. Transfer to a clean work surface. Cut the dough in half, place half on top of the other, and press down. Repeat the cutting and pressing steps three or four times until all of the water is incorporated into the dough and it clings together.
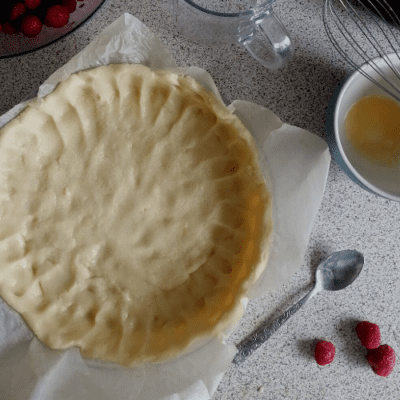
- On a floured surface, gently flatten the ball of dough with a rolling pin. Starting from the center, roll the dough into a circle that is approximately 10 inches in diameter and ⅛-inch thick. Carefully roll dough over onto the rolling pin and transfer to the pie dish. Crimp the edges and fill, parbake, or bake as the recipe suggests.
- To store the dough, form into two discs and wrap in plastic. The dough will be good for up to 2 weeks in the refrigerator.
To make in a food processor
- Cut the butter into ½-inch pieces and place them in the bowl of the food processor. Add the flour, salt, and sugar (if using). Process until the ingredients are well-incorporated and butter is in both large and pea-size chunks. With the processor on, add the water a tablespoon at a time until the dough begins to clump but is still crumbly. Continue to drizzle a little water and pulse the food processor, stopping to test the dough with your fingertips to see if it is moist enough to hold together.
- When you can gather the dough into a ball, remove it from the processor, place it on a lightly floured surface, and roll out and fit into the pan or store, as instructed above.

Leave a Reply