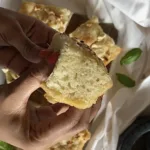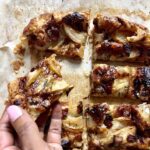

Since buying a block of compressed yeast at the beginning of the pandemic, I’ve been making lots of cinnamon rolls. If you follow me anywhere on social media, I am sure you’ve seen them. Spiced pecan cinnamon rolls. Apple pie cinnamon rolls. Peach rolls. Chocolate chip rolls. I’ve rolled plenty of ingredients into that extremely versatile yeast dough, and I’m not anywhere close to being finished yet. (I even made a pizza from the dough, which you can check out here.) This past week I finally worked up the nerve to make a loaf of white bread.
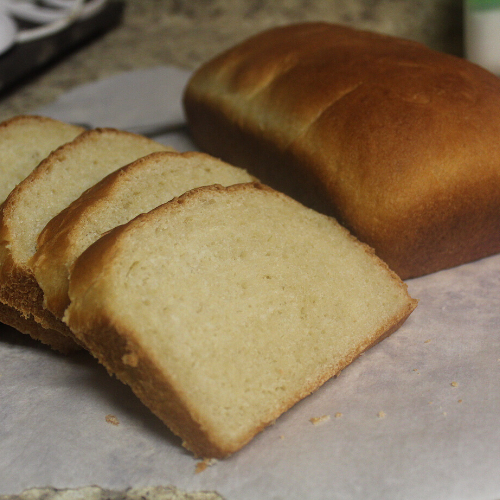
That’s right, nothing fancy or elaborate – just two loaves of plain white bread. I don’t know about you other home cooks, but something about the simplicity of certain recipes makes me a little nervous. Like, how can you mess up bread? It’s *just* bread, right?
And, well, I was right. It is *just* bread. Flour, salt, sugar, yeast & oil. After a quick Google search, I landed on this recipe and used it as a starting point. If you’ve never baked your own bread at home before, from one first-timer to another, you can do it. I promise.
In this post I’ll go over the exact recipe I ended up using and some FAQs that cover the details of the process. I’ll also show you guys some of what I’ve made so far with my white bread loaves.
FAQs & the process of making white bread
What ingredients are necessary?
- Warm water: (110-115º F) – this is the temperature range needed to activate the yeast
- Yeast: Instant, rapid rise, active dry or fresh yeast can be used – adjust for the yeast you have by following the adaptations meaned below and in my recipe instructions (I used instant yeast)
- Granulated sugar or honey: the sugar is used to “feed” the yeast and tenderize the bread.
- Salt: to enhance flavor
- Oil: Vegetable or canola oil, or melted butter could be substituted
- Flour: Bread Flour or All-Purpose Flour can both be used with no changes to the recipe. The exact amount of flour used will vary depending on different factors (altitude/humidity etc.). What matters is the texture of the dough. It should be smooth and pull away from the sides of the bowl. It’s important not to add too much flour or your bread will be dense. The dough should be just slightly sticky when touched with a clean finger.
How do I treat instant yeast differently than dry or fresh yeast?
- For instant and rapid yeast there is no pre-dissolving and resting first required (also known as “proofing” to ensure it is still alive and active).
- Active dry and fresh yeast should be dissolved and proofed before using.
- Also when using fresh yeast (which is more hard to come by and usually only has a two week shelf life) you need to use twice the amount listed in the recipe.
What kind of equipment will you need?
- A stand mixer with dough hook for kneading (optional – can mix and knead by hand)
- Mixing bowl for first rise
- Rubber spatula or dough scraper
- Loaf pans (2)
- Instant-read thermometer to check for doneness
How long does it take (active vs. inactive time)?
Most of the time spent making this recipe will be inactive. The initial mixing and kneading take about 20 minutes. The first rise is 1.5 to 2 hours, but this time can be spent doing other things. You will spend another 1-2 minutes forming the loaves before the second rise, which is another 1 – 1.5 hours.
You will need about 30 minutes of active time and about 4 hours of inactive time overall.
What is ‘punching down’?
Punching down is the act of using a fist to deflate and knead your yeast dough before shaping.
Tiny air pockets will form inside the dough as it rises. The goal of punching down is to reduce and remove these gasses. This brings the yeast, sugars, and moisture back into one cohesive form.
Follow these instructions to punch dough your bread dough:
- Leave your dough in the proofing bowl.
- Make a fist with your hand and push it gently and firmly into the center of the puffy dough, deflating it.
- Use your other hand to fold the edges of the dough into the center to form the deflated dough into a ball.
- Remove the ball from the bowl and place it onto a lightly floured surface.
- Knead it two to three times before forming your desired shape or placing it into a bread pan.
How do you know and what should you do when it’s under proofed, finished proofing or over-proofed?
If your dough has proofed for more than 2 hours and you are worried that is has over-proofed, press down on it with one finger. If it doesn’t spring back at all, it has likely over-proof. To fix this, simply punch it down gently, reshape it, and let it proof again for the recommended amount of time. You will want to re-do your first rise then shape and place in the loaf pan(s) for the second rise.
What’s the difference between bleached and unbleached flour? Does that difference matter in this recipe?
The only difference between bleached and unbleached flour is that bleached flour goes through a process using chemical agents to bleach it more quickly. Unbleached flour’s bleaching process is natural and happens as the flavor ages. There is no difference in use and either work for this recipe.
What’s the best way to store the loaves?
Slicing and storing your bread loaves inside a bread bag like this is ideal. Any airtight container will keep the bread fresh for 3 – 5 days out on the counter. You should keep the bread at room temperature or cooler.
Can you freeze the loaves?
Yes! Wrap the loaves tightly in plastic wrap and then in aluminum foil or freezer paper. If you want another layer of protection, put the loaves in freezer bags with as much as air possible pressed out of the bag. You can even slice the loaves before freezing them so you’re able to pull out single slices when you need them.
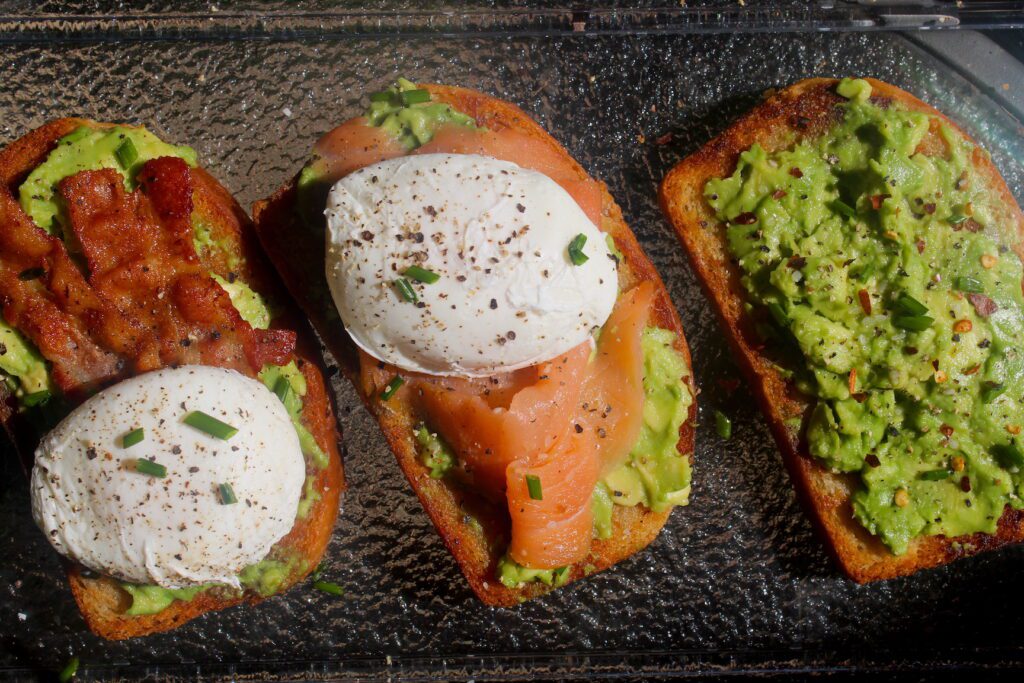
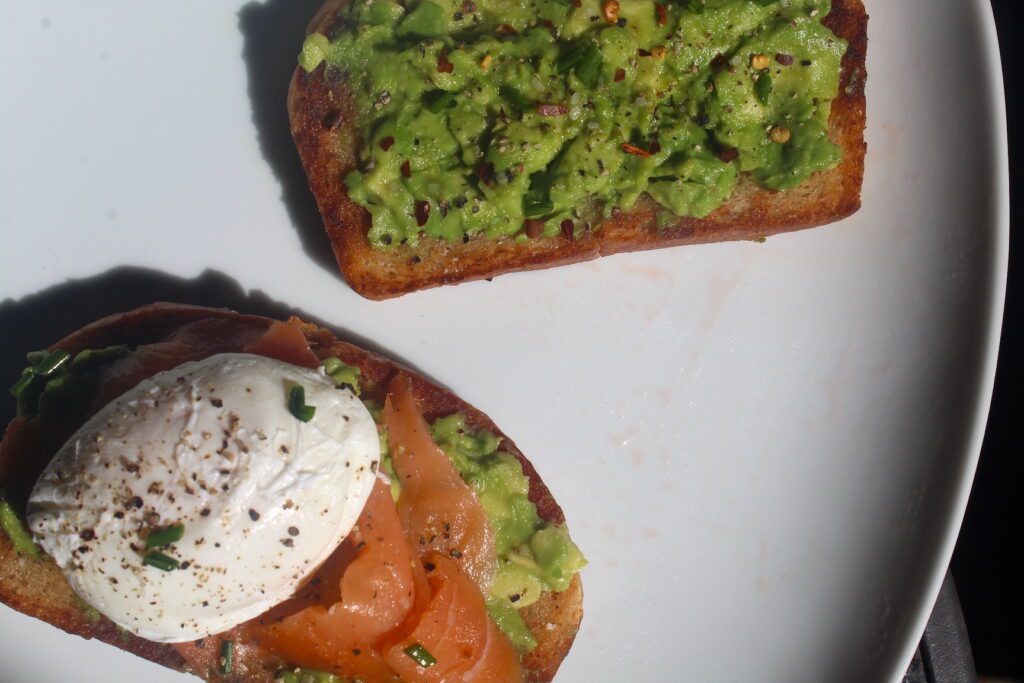
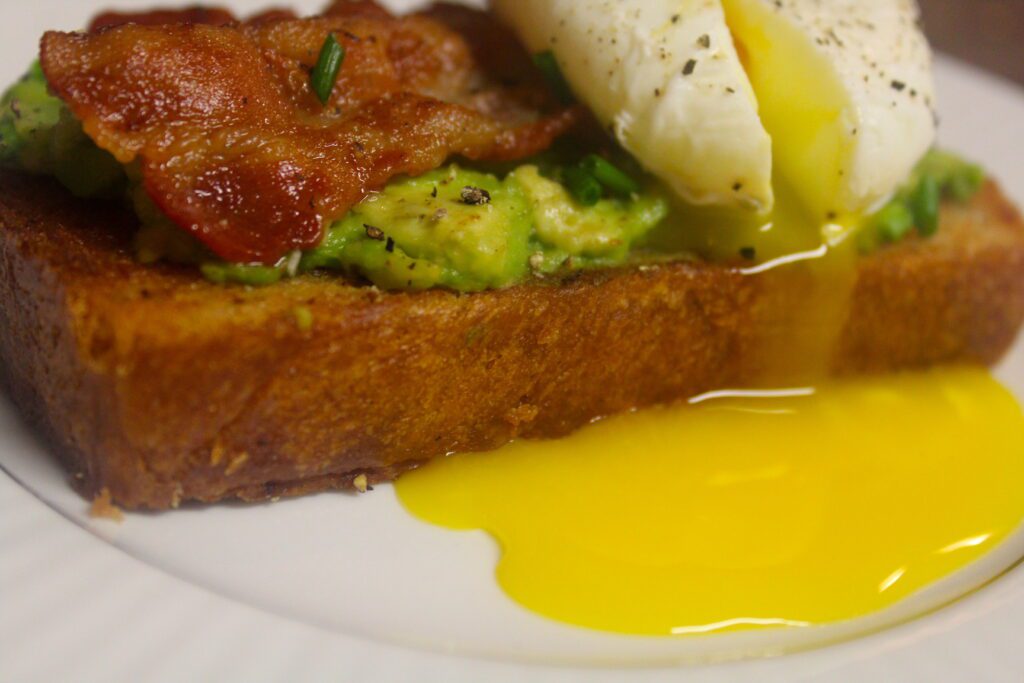
What I’ve made so far

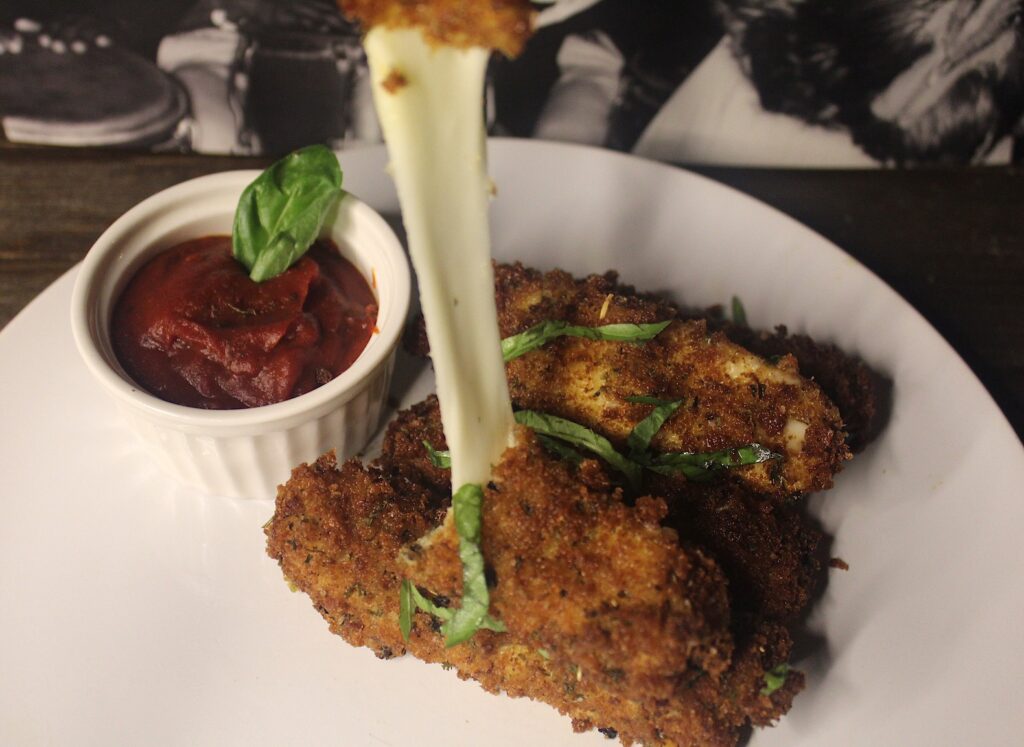
Mozzarella sticks
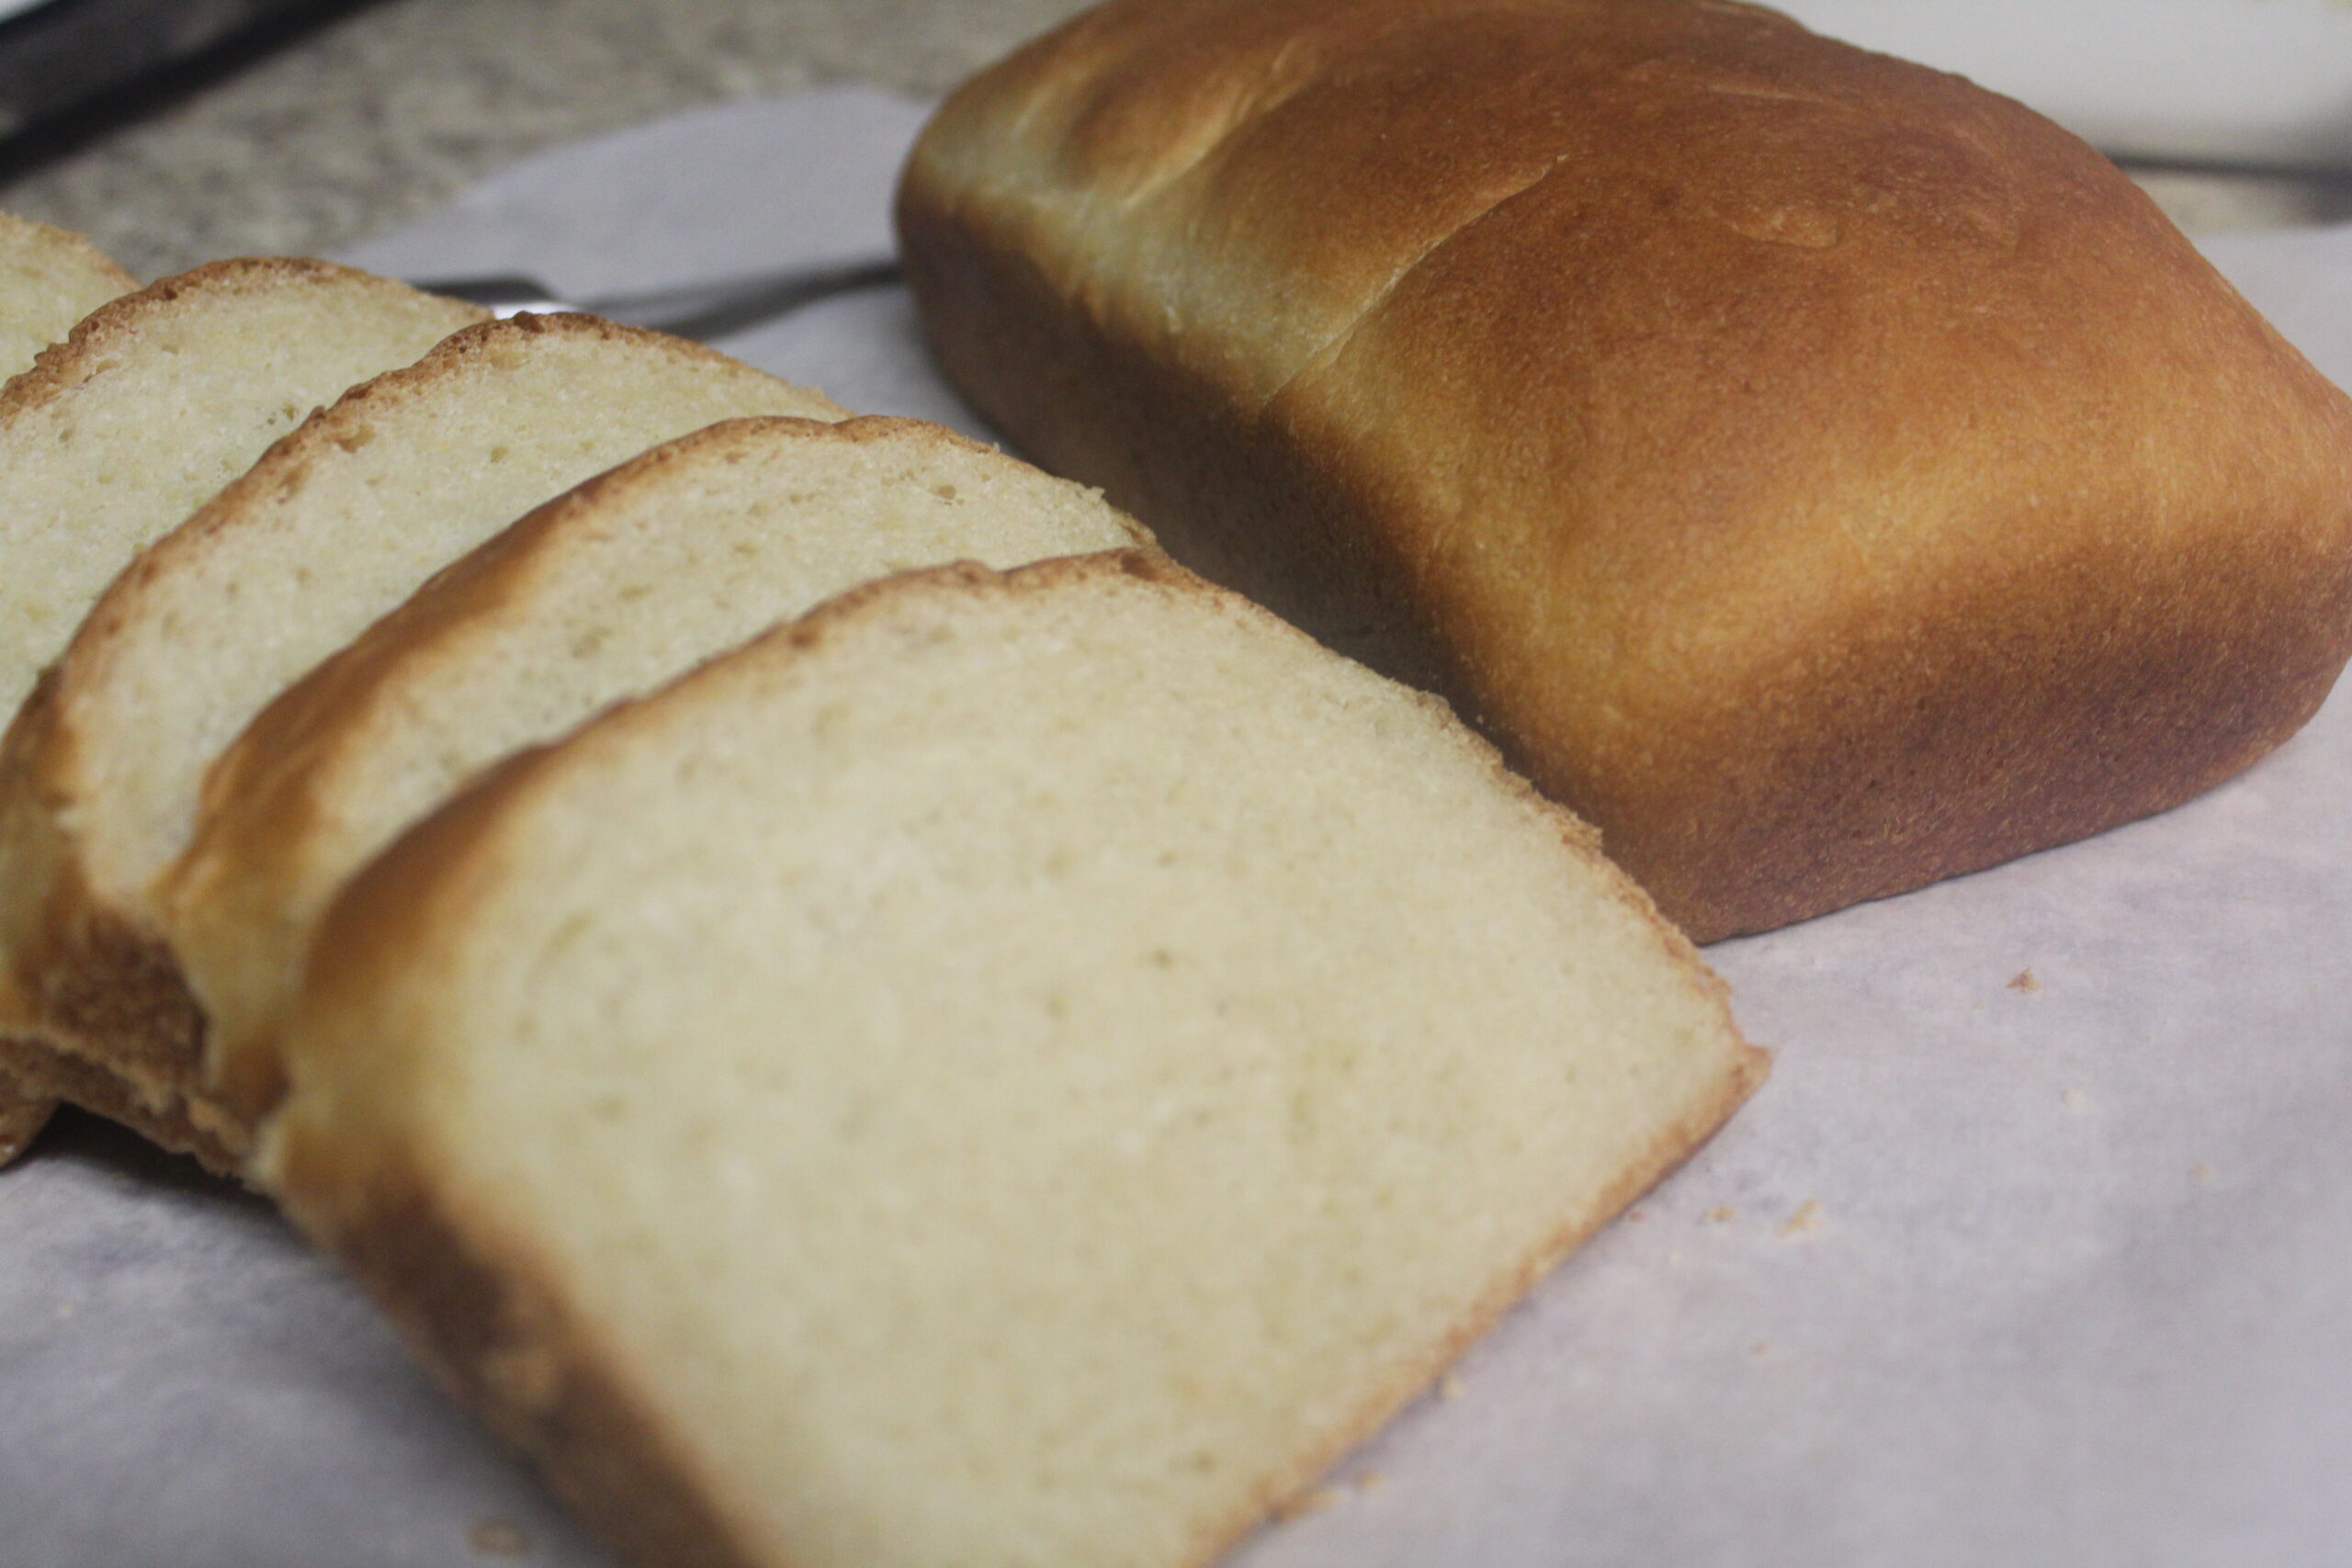
White Bread From Scratch
Equipment
- Stand mixer with hook attachment (if available)
- Instant read thermometer
- Measuring spoons/cups
- Plastic wrap
- Loaf pan
Ingredients
- 2 cups warm water 110-115º F
- 2 1/2 Tablespoons active dry or instant yeast
- 1/2 cup granulated sugar
- 2 1/2 teaspoons kosher salt
- 1/4 cup vegetable oil or softened butter
- 4 1/2 to 5 1/2 cups of all-purpose or bread flour
Instructions
Making the Dough
- In the bowl of an electric stand mixer* whisk together warm water, yeast and 2 teaspoons of sugar. Let rest 10 minute, if you are using dry active yeast.** If using instant yeast, there is no need to wait. Also, you can add all of the sugar in at once.
- To the yeast mixture add the remaining sugar, salt, oil (or butter) and about 2/3 of the flour. Fit the mixer with the paddle attachment or use a rubber spatula and mix well until combined. Switch to the hook attachment. Add remaining flour and knead on low speed until it comes together uniformly. Continue to knead on low speed, while adding a little more flour as needed. The dough is ready when it is still soft and supple but not sticky. Knead until the mixture no longer sticks to the sides of the bowl and it becomes smooth – for about 7 – 8 minutes.***
First Rise
- Transfer the dough to a large bowl that’s been sprayed with non-stick cooking spray or coated with a thin layer of oil. Also, coat the center of a piece of plastic wrap with non-stick cooking spray or oil and use this to cover the bread dough. Place the sprayed side down so the dough doesn’t stick to it once the dough rises. Don’t wrap too tightly so the dough has space to expand. Let the dough rest on the counter until doubled in size, about 1.5 – 2 hours.
Second Rise
- Remove the plastic wrap and punch down on the dough before transferring it to a clean, floured surface. Pat and stretch dough to a rectangle about 14 by 8-inches. Separate the dough into halves and repeat the following steps for each half:
- Pat and stretch*** dough into a rectangle about 14 by 8-inches. Then roll up the dough, starting on one of the 8-inch sides and rolling into a tight log toward the opposite 8-inch side.
- Transfer each rolled log of dough to a greased 9 by 5-inch loaf pan. Spray a sheet of plastic wrap with non-stick cooking spray (or re-use the plastic wrap used to cover the bowl) and drape greased side down over bread pan leaving room for the bread to expand. Let this rest until loaf is about 1.5 – 2 inches above the height of the loaf pan, about 1 hour. Around 45 minutes into that hour, preheat the oven to 350º F.
Baking
- Bake loaves in the center of the oven, rotating once halfway through baking, until golden brown on top and it sounds hollow when tapped, about 35 – 40 minutes.∞ The loaf should register between 195 – 200º F in the center using an instant-read thermometer. Remove from the oven and run a stick of butter over top (using about 1/2 Tablespoon per loaf). After 7 – 10 minutes in the pan, transfer to a wire rack to cool for at least 20 minutes before attempting to slice. Keep in mind, bread slices much more cleanly when it’s cooled all the way through. Store bread in an airtight container at room temperature for a few days or for longer shelf life store in the refrigerator.∞∞
Notes
** If you are using dry active yeast and there are no bubbles formed after the 10-minute rest, either the yeast was expired or the water was too warm.
*** Pat and stretch by hand instead of using a rolling pin to flatten the dough. You don’t want to get rid of all the air pockets that will make your bread light and tender inside.
∞ If you find the top of your bread is browning too quickly before the inside is finished, use a piece of aluminum foil to form a tent over the top of the loaves.
∞∞ If you put a warm loaf into an airtight container, the moisture will create steam and that will trap moisture inside the loaf. If you store bread in the refrigerator, be sure to wrap tightly and store in an airtight container or it will dry out quickly.