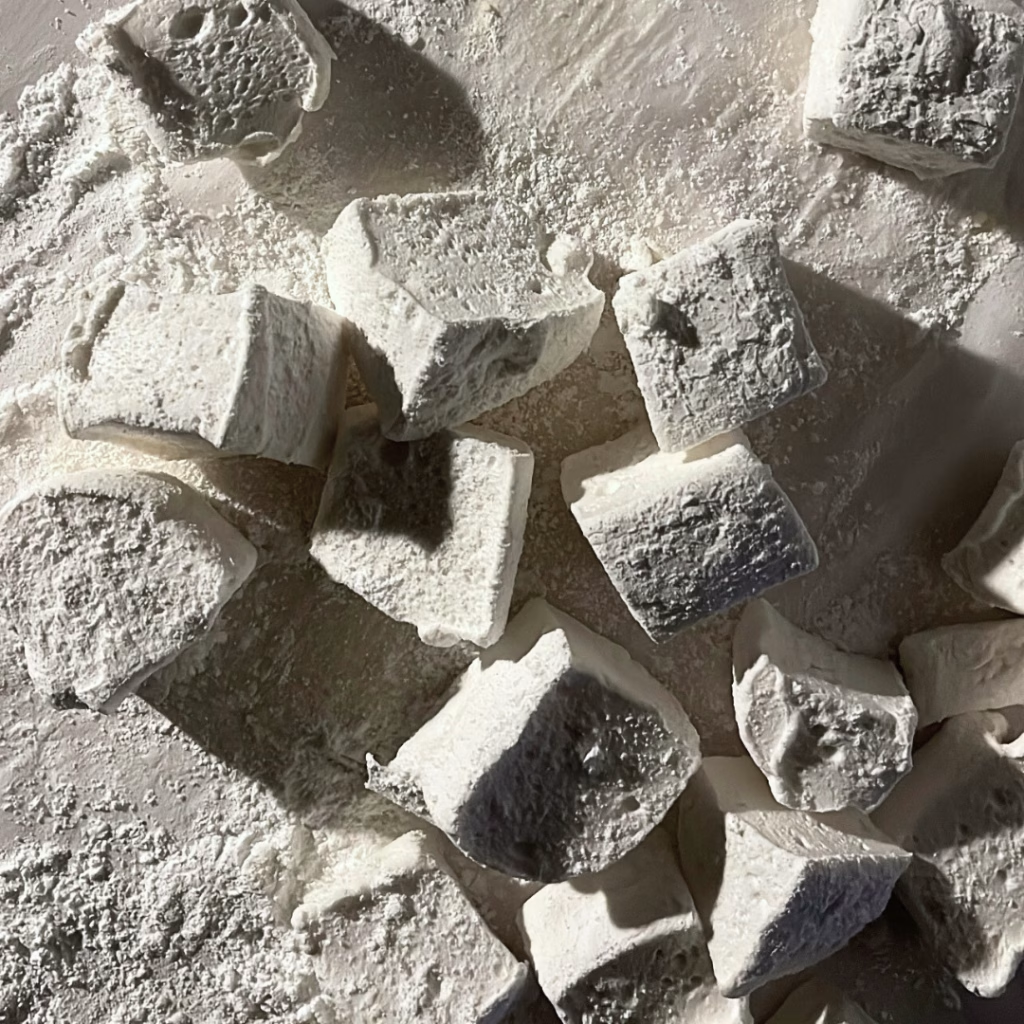
Have you ever had homemade marshmallows?! Me neither, until like a month ago, and learning taught me more than just how to transform sugar, water and gelatin. The first thing I learned (or was reminded of) is that I still don’t like s’mores all that much. I grew up disliking graham crackers, marshmallows, and plain chocolate so s’mores were a messy nightmare. The next thing I realized is that a lot – probably most – of the foods that we automatically buy processed at the store are incredibly simple to make ourselves. Like these parmesan herb crackers and like the marshmallows I’m about to share with you now.
Your grocery list
Pantry items
- White (granulated) sugar
- Corn syrup (to keep sugar syrup from crystallizing)
- Gelatin (1 box usually has 4 packets, but you’ll only need 3 for each batch of marshmallows you make)
- Vanilla extract (or whatever flavors you want to use)
- Coconut oil or butter (solid, for coating utensils so that marshmallow doesn’t stick to everything)
- Powdered sugar
- Cornstarch
Equipment/tools you’ll need
- Stand mixer with whisk attachment (not necessary, I suppose, but definitely handy since the syrup has to whisk for around 10 minutes and that could be a strain on your arm/shoulder with an electric hand mixer)
- Heavy-bottom pot (I’ve been using the pressure cooker pot my granny gave me, but any quality pot that will hold an even heat works)
- Candy thermometer (basically any thermometer that will allow you to clip it onto the side of the pot and has temperature readings that include the tenths place – “140.5 F” for example)
- Rubber spatula or wooden spoon
- 9×9 (ish) pan (for setting)
- Parchment paper
- Knife (for cutting marshmallows)
Step-by-step instructions for making homemade marshmallows
1) Bloom the gelatin
- Add 1/2 cup of water to the bowl of your stand mixer with the whisk attached. Mix in 3 packets of the gelatin and let that sit while making the sugar syrup.
2) Make the sugar syrup
- Heat a pot over medium heat. Add 1/2 cup of water, 2 cups + 1 tablespoon of sugar, and 1/4 cup of corn syrup. Only mix enough to moisten all of the sugar then DON’T STIR AGAIN. Seriously, this could cause crystals (aka shard of hard sugar) to form and ruin the light, fluffy texture of your marshmallows.
- Adding the corn syrup generally keeps this from happening, but to be safe, I still don’t agitate the sugar syrup while it cooks.
- Wait for the syrup to start boiling and then cover with lid. Continue cooking for 2 minutes before lifting lid to check the syrup’s progress.
- If there are still visible crystals of sugar on the bottom or up the sides, cover the pot again and continue cooking for 2 minutes. After another minute, the condensation in the pot will usually have melted any remaining sugar.
- Uncover the pot and clip your thermometer to the side of the pot or saucepan. Cook until the syrup reaches 142-145º F. Keep an eye on the temperature because it can sneak up on your.
- Once it reaches this temperature, remove the pot or saucepan from the heat until the bubbles have subsided.
3) Whip the gelatin and syrup together
- Start the stand mixer on a low speed to start mixing the bloomed gelatin. Use a rubber spatula or wooden spoon to scrape any pieces that may be stuck to the bottom of the bowl, if needed, before adding syrup.
- Slowly pour sugar syrup against the side of the stand mixer bowl to begin combining the gelatin with the syrup.
- Once it is all poured in, increase the speed to a medium high speed and whip for 5-7 more minutes (the mixture will basically triple in volume)
- This is when I add any flavorings (in this case, vanilla) and continue whisking for 2-3 minutes or until the mixture begins to naturally pull away from the sides of the bowl.
4) Pour and wait for the marshmallows to set
- Line a 9×9 (or something similar in size) pan with parchment paper that has been greased with butter or solid coconut oil.
- Combine powdered sugar and cornstarch into dusting powder.
- Coat the rubber spatula or wooden spoon with the same and pour/spread the marshmallow whip into the pan. Dust the top with powdered sugar + cornstarch mixture and wait for 5-6 hours to set.
- The parchment paper is optional, but it makes for easy removal and cutting of the marshmallows once they’ve set.
- After 6 hours, remove marshmallows from the pan by pulling up the parchment lining. Use a coated knife to cut the marshmallow into cubes or any shape of your choosing.
Tips for great homemade marshmallows (from what I’ve learned so far)
- Give the gelatin enough time to bloom in the water. If not, there may be a grainy texture to your marshmallows.
- Avoid stirring or messing with the sugar syrup. The corn syrup will help keep the syrup from crystalizing, but if you disturb the syrup too much, it could still happen.
- Pour the syrup down the side of the stand mixer bowl (or whatever bowl you’re using.) This will help “disturb” it less as it gently rolls into the whisk and mix with the gelatin. This also gives the syrup some time to cool down and keep the gelatin from being scorched.
- Use parchment paper and coconut oil (in its solid form). To keep the marshmallow from sticking to everything, I stuck a clean rubber spatula straight down into the jar of coconut oil once. That was enough of a coating to get the marshmallow out of the stand mixer bowl and into the parchment-lined pan for setting.
- Wait at least 5-6 hours for the marshmallow to set. I know it seems like a lot of time, and you may be able to use the less-set versions for other things, but a fully formed and set marshmallow takes at least 5 hours – 6 to be super safe.
How to store your marshmallows
- Keep marshmallows in an airtight container at room temperature for more than 2 weeks (mine are always used up by this point, but I’m sure they can last for months in a truly airtight container)
- Marshmallows containing egg whites can be stored for up to a week in an airtight container (in the fridge).
Ways to adjust your homemade marshmallows
- Add different flavors. Whatever extracts you have in the pantry, try a teaspoon of that instead of vanilla. Think lavender, orange, strawberry…
- Make chocolate and/or espresso marshmallows. Add 1-2 teaspoons of cocoa and/or espresso powder to the marshmallows 2-3 minutes before they are finished whipping.
- For a lighter marshmallow, add whipped egg whites during the whipping process. These will keep for less time at room temperature because of the eggs, but they make for a fluffier marshmallow. Gelatin-only marshmallows are fluffy, but much more sturdy with some bounce.
Ways to enjoy your homemade marshmallows
- With a cup of hot chocolate
- In your s’mores
- Making rice krispie, fruity pebbles, or any other cereal bars
- These CBM cookies
- Topping for your next sweet potato souffle
Print
Homemade Marshmallows
Just a combination of sugars, salt, gelatin, and vanilla - these marshmallows are simply delicious
Servings 28 large marshmallows
Cost $5
Ingredients
- 14.5 oz white sugar 2 cups + 1 tbsp
- ¼ cup corn syrup or 1/3 if agave syrup
- ½ cup water for sugar syrup
- ½ cup water for the gelatin blooming
- 7 tsp gelatin about 3 packets of Knox or store-brand gelatin
- Pinch of salt
- 1 tsp pure vanilla extract
- 2 egg whites if using (for lighter/softer marshmallows)
Dusting powder
- 1 cup confectioner’s sugar sifted
- ½ cup cornstarch or corn flour
Instructions
Make the marshmallow base
- Place ½ cup of water in the mixer bowl. Add the gelatin to the water and mix to moisten the gelatin. Set aside to allow the gelatin to bloom while the sugar syrup is cooking (at least 10 minutes). Place the bowl in your mixer, with the whisk attachment.
- Place the sugar, corn syrup (or agave), and water in a pot over medium-high heat. Stir just until the sugar is moistened and mixed with the water.
- If you’re not using corn or agave syrup, place the sugar in the saucepan and pour the water along the edge of the saucepan. Gently swirl the pan to evenly distribute the heat, but do not stir. Cook until the mixture begins to bubble/boil.
- Cover the saucepan with a lid and lower the heat to medium. Let the syrup cook for 2 minutes. Do not lift the lid at this point.
- After 2 minutes, remove the lid and check to make sure there are no sugar crystals on the side of the pot or saucepan. If there are crystals, then cover the saucepan for a further minute to allow the condensation to wash down the sugar crystals into the syrup.
- Uncover and clip the sugar thermometer to the side of the saucepan. Let the sugar syrup cook until it reaches 142-145º F. If you don’t have a sugar thermometer, please check the notes for instructions on how to check if the syrup is ready with out one.
- When the sugar syrup reaches the right stage, remove it from the heat until the bubbles are gone. While the mixer is running on medium – low speed, pour the sugar syrup into the gelatin, along the wall of the bowl. Add the salt and increase the speed to medium – high.
- Whisk on medium – high for 5-7 minutes until the marshmallow base is basically 3 times the size. At this point, add vanilla extract and continue whisking for 2-3 minutes.
- Optional – whisk the 2 egg whites in a clean metal bowl until you have stiff peaks. Combine these to the whipped marshmallows for a lighter, softer finished product.
Make the dusting powder
- Mix the confectioner's sugar and cornstarch together until well combined. Set aside until needed. This will be more than enough for multiple batches, so keep the remainder in a ziploc bag or container with a lid until you need it again.
Prepare the pan
- While the marshmallow base is whisking, prepare the pan and utensils you will be using. Line a 9x9 pan with parchment paper greased with coconut oil, shortening or butter. Brush all the utensils – spoon, spatulas with the same fat as well.
Let the marshmallows set
- Scrape the marshmallow base into the prepared pan using an oiled cake spatula or flexible scraper. Spread the marshmallow evenly in the pan using the oiled spatula.
- Sieve confectioner’s sugar over the top of the marshmallow and allow the marshmallow to set for at least 6 hours.
- Turn the set marshmallow out onto a work surface dusted with dusting powder. Cut the marshmallows with an oiled knife or a pair of scissors. Toss the marshmallow in the dusting powder and store in an air-tight container.
Notes
- Increase the sugar to cups, if you’re not using agave or corn syrup
- Increase water to cup if you’re not using agave or corn syrup
- To check your sugar syrup has reached the correct stage without using a sugar thermometer, place a bowl of very cold water next to where you're cooking the syrup.
- Using a clean spoon, carefully take a little of the syrup and drop it into the bowl of cold water. Leave to cool for a moment then pick up the ball of syrup. If it’s pliable, sticky and can be moulded in your fingers easily, it has reached the soft ball stage.
- To reach the hard ball stage, continue cooking the syrup and then pour a spoonful into the bowl once more to test. It should hold together in a firm ball and will be tougher to re-shape as it cools. <<<< THIS IS WHAT YOU WANT
- As the temperature of the sugar increases, the sugar syrup will begin to go browner in the pan. It will harden immediately as it hits the water. The sugar will begin to crack and break apart under pressure. The hard crack stage is used for lollipops, spun sugar and hard toffees.


